Managing User Accounts in the Settings Page
1. Introduction
The Settings page allows you to manage user accounts within the system, including Admin, Guardian, and Deactivated accounts. From this page, you can:
- Add, Edit, Delete, and Restore deactivated accounts.
- Manage and organize users efficiently with filtering and searching features.
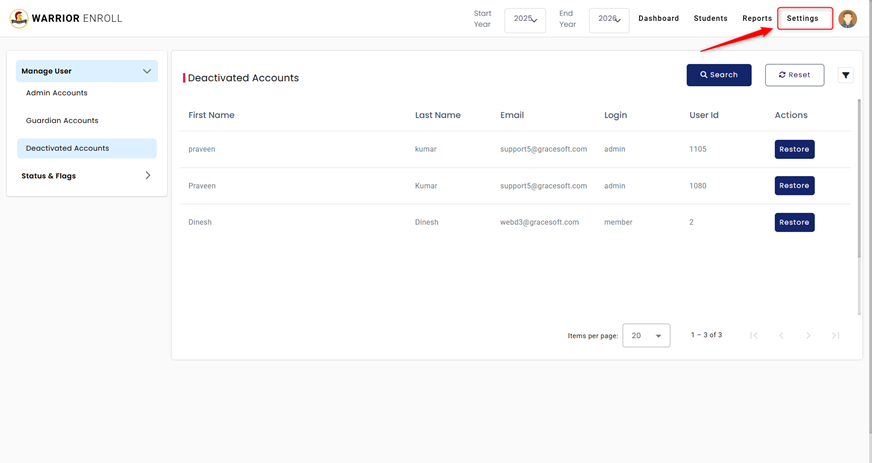
2. Accessing the Settings Page
To access the Settings page:
- Log into your account.
- Click on the “Settings” option located in the top-right corner near your profile picture.
3. Settings Categories (Sections)
The Settings page is divided into several sections that help you manage the different types of accounts. Below is a breakdown of each section:
a. Manage Users
To manage users, you will use the Manage User dropdown. This dropdown provides easy access to all the user account management options.
- Step 1: Click on the “Manage User” dropdown to access the following options:
- Admin Accounts
- Guardian Accounts
- Deactivated Accounts
b. Admin Accounts
In the Admin Accounts section, you can manage all the admin-level users in the system.
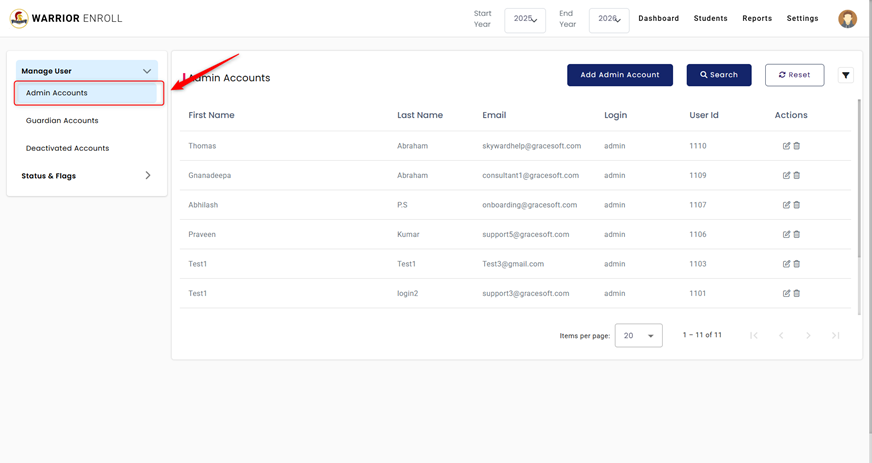
- Viewing Admin Accounts:
- You will see a list of all admin accounts along with the following details:
- First & Last Name
- Login
- User ID
- You will see a list of all admin accounts along with the following details:
- Actions Available:
- Add Admin Account: Click this button to add a new admin account.

- Search: Use the search bar to find a specific admin by name or email.
- Reset: Click the reset button to refresh the list and remove any applied filters or searches.
- Filter: You can filter the list of admin accounts by:
- First & Last Name
- Editing and Deleting Admin Accounts:
- Under the Actions column, you can:
- Edit: Modify the details of an admin account.
- Delete: Remove the admin account from the system.
- Under the Actions column, you can:
c. Guardian Accounts
In the Guardian Accounts section, you can manage all the user accounts with Guardian privileges.
- Viewing Guardian Accounts:
- You will see a list of all guardian accounts along with the following details:
- First & Last Name
- Login
- User ID
- You will see a list of all guardian accounts along with the following details:
- Actions Available:
- Add Guardian Account: Click this button to add a new guardian account.
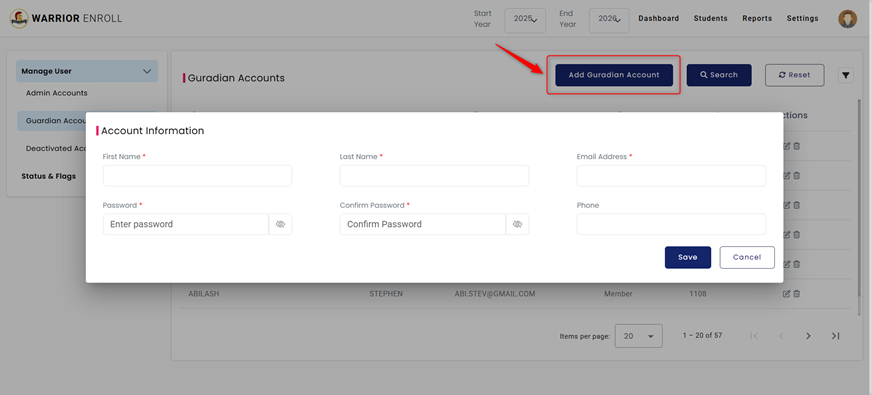
- Search: Use the search bar to find a specific guardian by name or email.
- Reset: Click the reset button to refresh the list.
- Filter: You can filter the list of guardian accounts by:
- First & Last Name
- Editing and Deleting Guardian Accounts:
- Under the Actions column, you can:
- Edit: Modify the details of a guardian account.
- Delete: Remove the guardian account from the system.
- Under the Actions column, you can:
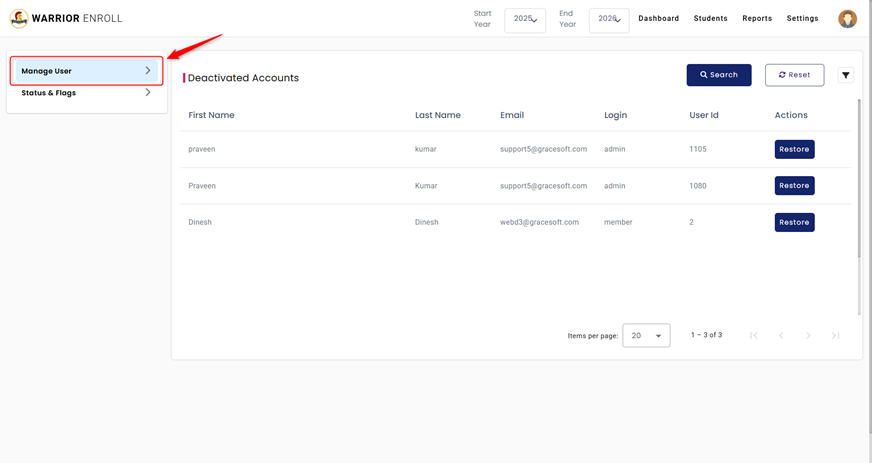
d. Deactivated Accounts
In the Deactivated Accounts section, you can manage users who have been deactivated but may need to be restored.
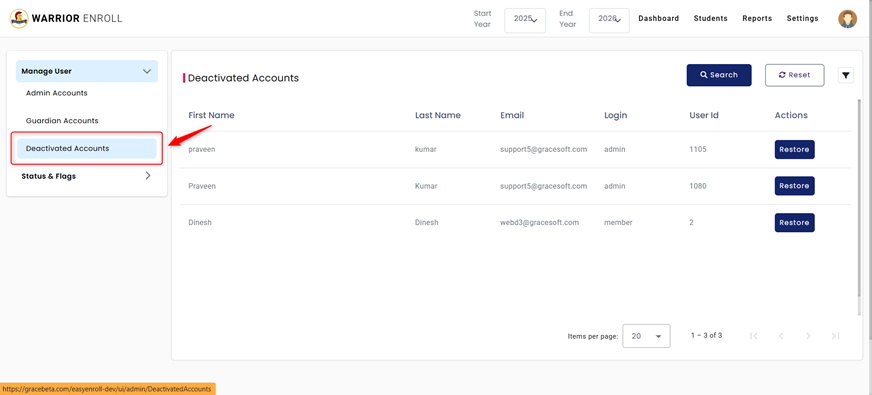
- Viewing Deactivated Accounts:
- You will see a list of all deactivated accounts along with the following details:
- First & Last Name
- Login
- User ID
- You will see a list of all deactivated accounts along with the following details:
- Restoring Deactivated Accounts:
- If you need to restore an account, simply click the “Restore” button next to the deactivated account you wish to restore.
- Actions Available:
- Filter: You can filter the list of deactivated accounts by:
- First & Last Name
- Filter: You can filter the list of deactivated accounts by:
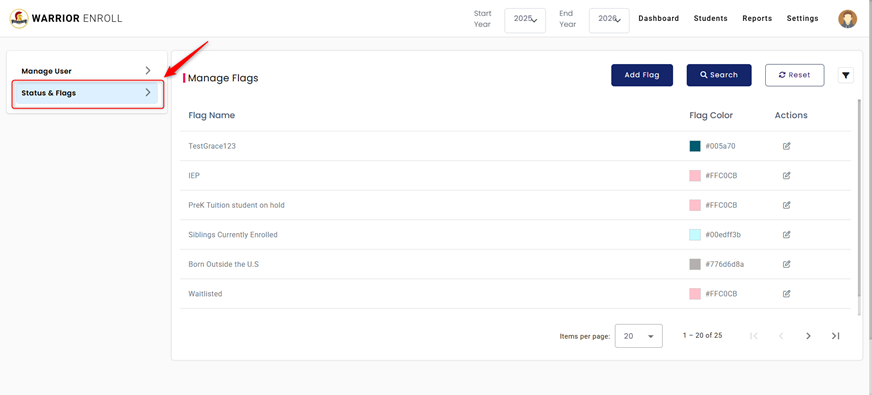
? Status & Flags
The Status & Flags dropdown allows users to manage and customize system statuses and flags for better categorization and visual tracking. This section consists of two options: Manage Status and Manage Flags.
1. Manage Status
The Manage Status section lets you view, create, and edit custom statuses used within the system.
Displayed Columns:
- Status Name – The name of the status.
- Status Colour – Colour used to distinguish the status visually.
- Editable – Indicates whether the status can be edited.
- Date Enable – Specifies if the status includes date functionality.
- Group Name – Used to categorize statuses under a common label.
- Actions – Edit options for existing statuses.
Adding a New Status
![]()
Clicking the ADD Status button opens a pop-up titled Registration Status Information, where you can define your status using the following fields:
- Status Name
- Status Colour
- Group Name
- Editable (Checkbox)
- Date Enable (Checkbox)
Filtering Options
You can filter the status list by:
- Status Name
- Group Name
2. Manage Flags
The Manage Flags section allows you to set up color-coded flags to tag and identify records based on specific criteria.

Displayed Columns:
- Flag Name – The name or label for the flag.
- Flag Colour – Visual colour associated with the flag.
- Actions – Edit options for existing flags.
Adding a New Flag
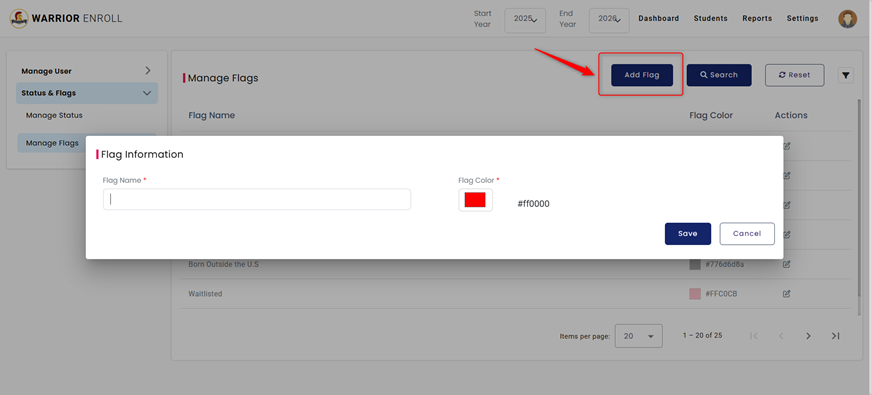
Clicking the ADD Flag button opens a pop-up titled Flag Information, where you can create a new flag using the following options:
- Flag Name
- Flag Colour
Filtering Options
You can filter the flag list by:
- Flag Name
Was this article helpful?
That’s Great!
Thank you for your feedback
Sorry! We couldn't be helpful
Thank you for your feedback
Feedback sent
We appreciate your effort and will try to fix the article